If you own any Notebook for longer than one year then there comes a time when the cooling fan starts to run constantly and the device starts to get hot even in everyday tasks. My U550 is now 1 and a half years old and has started to use the fan all the time so I decided it was time for some maintenance, so cleaning the fan.
After searching the internet high and low I wasn’t able to find any guide on how to open the actual case of the U550. I actually got some results about how to repair a tractor but that’s a different story.
So I decided to do it myself, and after 2 hours here are the results.
WARNING!
This is a home made guide and should be treated as such, I will not be held accountable for any property damage that may occure in the usage of the following guide.
For this you will need the following tools:
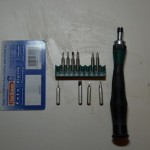
1 old credit card, or something wide and hard
1 very very thin hard object(in my case the smallest bit to the left)
1 straight head screwdriver preferably wide
2 + head screwdrivers
1 notepad
1 pencil
1 toothbrush or other small soft brush
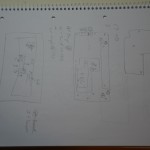
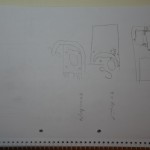
The notepad might come as a surprise to some but if you are also doing this for the first time it comes in very useful if you happen to forget where a screw comes in or what cables are left to be connected. Here are my notes after doing the hole project:
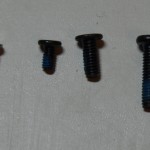
I decided to do this because I have disassembled Notebooks in the past and always ended up with a hand full of screws at the end because I forgot where they came from. Also a Notebook has many different types of screws in it witch after 2 hours of trying to dismember the thing have a hard time finding their original place. An example of what I took out of my U550:
I suggest finding a well lit place with plenty of space to spread out.
Ok, now that we have all the preparation over let’s begin.
Step 1 – Removing the back cover
Start by turning off the device, taking out the battery, DVD drive, cables and any other accessories you might have connected to it. Turn the Notebook with the back facing upwards. Here we will have to undo 6 screws witch hold the cover for the RAM and HDD.
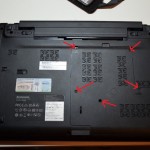
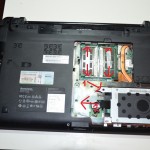
Remove the cover to gain access to the HDD and RAM.
Step 2 – Removing HDD and RAM
Remove the screw holding the HDD in place and gently remove the HDD from it’s slot by pulling to the left and after the HDD is free from the connector it can be removed.
Also remove the RAM from their slots by pushing the metal retainers outwards and the modules should pop up and be easy to remove.
Note: If you only want to make an upgrade to your system you could stop now and just install the bigger HDD, SSD or RAM in the place of the old ones and put everything back in place.
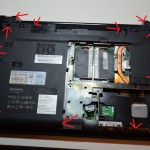
Step 3 – Removing main screws
This is where the notepad and pencil comes in handy. Remove the 15 screws holding the main back cover. 4 of these are longer than the rest so be careful where you put them. Lenovo has kindly marked the places where the long screws come so that you know were they were when you screw them back in.
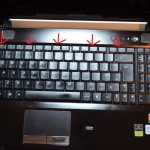
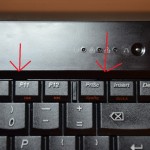
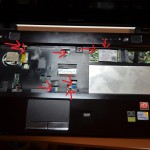
Step 4 – Removing the Keyboard
To remove the Keyboard turn the Notebook over, open it. The keyboard is being held in place by some screws we removed earlier and plastic clips placed like in these photos:
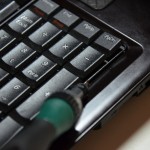
To remove the keyboard you need to use something really really thin to get between it’s edge and the plastic front bezel. I used the smallest bit I had for my screwdriver and began from the clip on the right side.
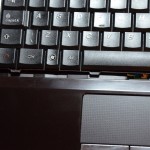
After you’ve managed to lift the keyboard just a little you can use the credit card on the other clips all the way to the other side. Then you can gently move the keyboard toward the screen to free it from the clips underneath the bevel.
Now we have to remove the connector for the keyboard. It will be a wide flat cable witch is held in place by a black strip. You have to gently lift/rotate the black strip to free the keyboard cable.
Place the keyboard in a place that won’t be in your way or where you can damage it accidentally.
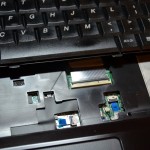
Step 5 – Removing the front cover
First we have to remove the remaining 3 screws holding the housing together. One of them is hidden underneath the wireless card. We also need to disconnect all the connectors for the touchpad, fingerprint sensor leds and so on. Just like in these photos:
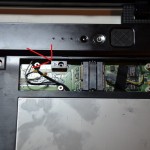
Note: the wireless card connectors are very sensitive so try to be gentle with them.
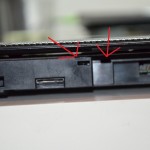
After all the connectors and screws have been removed you can start to insert a credit card or any other wide object in between the bevel and back cover and slowly lift the front bevel all the way around.
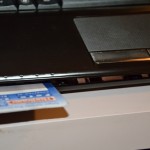
It still is connected at the back with 3 very stubborn clips, I managed to brake 2 out of 3 so be careful.
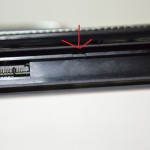
After you have opened the back clips the back and with all the screws and connectores removed the bevel should come off with ease.
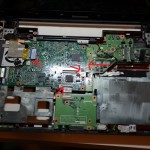
Step 6 – Removing CPU GPU Fan assembly
The CPU GPU and Fan are all connected to one board and can be removed easily. The entire assembly is held in place by one screw and has 5 connectors. Open the screw and the 4 visible connectors and gently lift the piece to disconnect it from it’s 5th connection.
Step 7 – Removing and cleaning Fan
After the previous step you should remain with the CPU assembly looking like this:
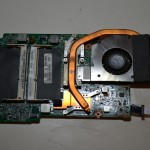
To remove the cooling system unscrew the 5 silver screws. These are smaller than the rest so you need the other + screwdriver i specified in the beginning. Also don’t forget to disconnect the fan’s power connector from the other side.
On closer inspection the fan was indeed full of dirt but not as much as I expected. The ducts were also dirty but like the fan nothing serious.
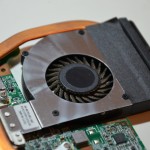
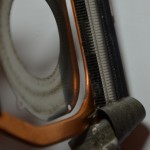
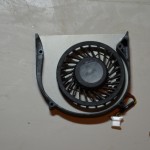
To remove the fan just unscrew the 4 small black screws and unwind the black tape from around the fan housing and the ducts. You should end up with something looking like this:

The actual cleaning of the fan is done with the help of a very specialized tool called a toothbrush. You can use any old toothbrush as long as it’s dry and it doesn’t have any residue toothpaste on it. To remove the residue toothpaste just brush it a few times with you finger and a lot of white powder will get out of it.
Use it on the fan and the ducts to clean all the dirt that has accumulated over time. You should get something like this:
Step 8 – Reassembly
The reassembly is done in the revers order of the disassembly. If you have used your notepad and pencil this should not be a problem. Take it slow, check every screw and connector twice before moving on to the next step so that you don’t forget anything.
Note:
For the reassembly of the cooling system on the CPU and GPU I recommend cleaning and applying new thermal paste so as to maintain the properties of the cooling system.
Good luck!
thank you so much for the images also i was wondering if you have an idea where i can find the cmos battery of the same machine i want to reset the bios settings. my screen wont turn on this happened after i changed some gpu settings in the bios setup utility (f2 on startup) any idea
I realy can’t tell you where it is. I wasn’t looking for it when i did this but i guess it should be somewhere on the smaller board (with cpu&gpu).
Great tutorial,thanks !